Swapping out an old thermostat for a smart one is one of the easiest upgrades a homeowner can tackle, and one of the most rewarding. Modern smart thermostats can cut heating and cooling costs by up to 23%, learn household routines, and let users adjust temperatures from anywhere. Most installations take under an hour and require no electrical experience beyond basic wire matching. That said, there are a few compatibility checks and safety steps worth knowing before anyone touches a wire. This guide walks through everything needed to install a smart thermostat correctly and safely.
Table of Contents
ToggleKey Takeaways
- Installing a smart thermostat can cut heating and cooling costs by up to 23% and typically takes under an hour without requiring electrical experience.
- Always check HVAC compatibility before purchasing by verifying voltage (usually 24V), confirming a C-wire exists or can be installed, and using the manufacturer’s online checker for your system type.
- Turn off power at the breaker, label wires before disconnecting them, and take a photo of the existing wiring setup as a backup reference before removing your old thermostat.
- Match each wire carefully to its correct terminal (R, W, Y, G, C) on the new backplate and tug gently on each wire after tightening to ensure it’s fully secure.
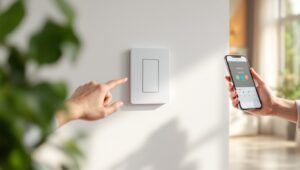
- Complete the Wi-Fi setup during initial configuration, set your system type and preferences in the app, and enable notifications to catch maintenance issues or temperature problems early.
- If the system won’t respond to heat or cool calls after installation, verify each wire is seated firmly in the correct terminal and recheck the equipment configuration in settings.
What You Need Before You Start
Tools and Materials
Most smart thermostats ship with mounting hardware, but a few common household tools make the job smoother. Here’s what to gather:
- Phillips-head screwdriver and flat-head screwdriver (for terminal screws and mounting)
- Drill with bits (if installing into drywall without a stud: optional if mounting to existing holes)
- Wire labels (usually included with the thermostat)
- Voltage tester or non-contact voltage detector (to confirm power is off)
- Level (ensures the new unit sits straight)
- Pencil (for marking screw holes)
- Drywall anchors (if not mounting to a stud or existing backplate)
- Safety glasses (particularly if drilling)
The smart thermostat itself typically includes a backplate, trim plate, wire labels, screws, and sometimes a small bubble level. Don’t assume the old thermostat’s backplate will work, most smart models require their own.
Checking Your HVAC Compatibility
Not every heating and cooling system plays nicely with smart thermostats. Before buying, check three things:
Voltage: Most residential HVAC systems run on 24-volt AC low-voltage wiring. Smart thermostats are designed for this. High-voltage systems (like electric baseboard heaters at 120V or 240V) typically need a line-voltage thermostat or a relay adapter. A voltage tester on the thermostat wires confirms what’s running through the wall.
C-wire (common wire): Many older thermostats don’t use a C-wire, but most smart models need one to maintain constant power for Wi-Fi and the display. If there’s no C-wire at the thermostat but one exists at the furnace, it can often be connected. Some manufacturers include a power adapter kit that pulls power from the furnace directly. Without a C-wire and no adapter, the thermostat may lose connection or fail to charge.
System type: Smart thermostats support most forced-air systems (gas, electric, heat pump, dual-fuel), but some struggle with multi-stage setups, zone systems, or proprietary protocols (like some Carrier or Trane communicating systems). Nearly all manufacturers offer online compatibility checkers, enter the existing wire labels (R, W, Y, G, C, etc.) and the tool confirms whether the system will work. If there’s any doubt, snap a photo of the existing wiring and check with the thermostat manufacturer’s support line before purchasing.
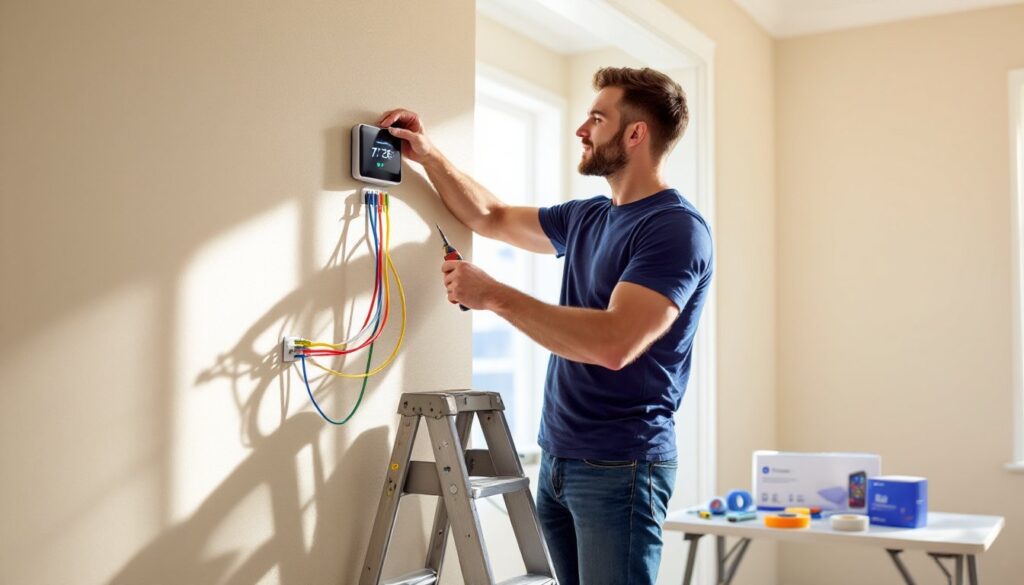
Step-by-Step Installation Process
1. Turn off power at the breaker. Locate the circuit breaker controlling the furnace or air handler and flip it off. Low-voltage thermostat wiring won’t cause serious shock, but it’s safer to work with the system fully de-energized. Use a voltage tester on the thermostat wires to confirm there’s no current.
2. Remove the old thermostat. Most units pop off a base plate. Pull the body straight off, then unscrew the backplate from the wall. Before disconnecting any wires, take a photo of the existing wiring setup, this serves as a backup reference. Label each wire with the terminal letter it’s connected to (R, W, Y, G, C, etc.) using the stickers that came with the new thermostat. Some wires may be bundled or have multiple wires on one terminal: note this carefully.
3. Disconnect and prep the wires. Unscrew each wire from its terminal and gently pull it through the wall opening. If wire ends are frayed or corroded, trim them back about 1/4 inch and strip a fresh 1/4 inch of insulation using wire strippers or a utility knife. Straighten each wire and keep them separated so they don’t fall back into the wall, taping them to the wall temporarily helps.
4. Install the new backplate. Thread the wires through the center opening of the smart thermostat’s backplate. Hold the backplate against the wall, use a level to ensure it’s straight, and mark the screw holes with a pencil. If the new plate doesn’t align with the old screw holes and the wall surface is drywall without a stud behind it, use drywall anchors. Drill pilot holes, insert anchors, then fasten the backplate with the included screws. Some backplates have built-in levels or snap-off sections to accommodate different wire bundles.
5. Connect the wires to the new thermostat. Match each labeled wire to the corresponding terminal on the backplate. Loosen the terminal screw, insert the bare wire end, and tighten the screw firmly, tugging gently on the wire confirms it’s secure. Common terminal labels include:
- R or Rh: Red wire, 24V power from heating
- Rc: Red wire from cooling (sometimes jumpered to Rh)
- W or W1: White wire, heat control
- Y or Y1: Yellow wire, cooling (compressor)
- G: Green wire, fan control
- C: Blue or black wire, common (power return)
- O/B: Orange wire, reversing valve (heat pumps)
If there are extra terminals or wires, consult the installation manual. Don’t force wires into terminals they don’t belong in. Many systems using heat pumps require careful configuration to avoid reversing valve errors.
6. Attach the thermostat to the backplate. Once all wires are secure, gently push any excess wire back into the wall. Align the thermostat body with the backplate and press or snap it into place according to the manufacturer’s instructions. Some models use screws: others have a magnetic or clip-on attachment.
7. Restore power and test. Flip the breaker back on. The thermostat should power up and display a setup screen. If it doesn’t turn on, double-check the C-wire connection and ensure the breaker is fully engaged. Run a quick system test by setting the thermostat to heat or cool and confirming the furnace or AC responds. Listen for the click of relays and feel for airflow at a vent.
Setting Up Your New Smart Thermostat
Once the hardware is installed, the thermostat will prompt for initial configuration. This process varies by brand, but the essentials are similar.
Wi-Fi connection: The thermostat needs to join the home network to enable remote control and software updates. Select the network name (SSID) from the on-screen menu and enter the password using the dial or touchscreen. Some models support WPS push-button pairing if the router has that feature. Once connected, the device will typically download the latest firmware, don’t interrupt this: it can take several minutes.
System configuration: The thermostat will ask about the type of HVAC system (forced air, heat pump, radiant, etc.), fuel source (gas, electric, oil), and number of heating and cooling stages. Answer based on the equipment installed. If unsure, check the furnace or air handler data plate for model details. Some smart thermostats auto-detect system type based on which wires are connected.
Sensors and scheduling: Many models include occupancy sensors or connect to remote room sensors for multi-zone temperature balancing. During setup, the thermostat may ask to calibrate these or run a test cycle. It’s also the time to set preferences like temperature scale (Fahrenheit or Celsius), auto-schedule learning, and eco modes. For units that learn routines, expect the first week or two to involve manual adjustments as the algorithm adapts.
Mobile app pairing: Download the manufacturer’s app (Nest, Ecobee, Honeywell Home, etc.) and create an account if needed. The app will search for the thermostat on the local network and pair via a QR code or PIN displayed on the thermostat screen. Once linked, the app provides remote control, energy reports, and alerts for maintenance like filter changes. Enable notifications for system errors or extreme temperature swings, they can catch issues before they become expensive repairs.
Geofencing and integrations: If desired, enable geofencing so the thermostat can detect when occupants leave or arrive home and adjust temperature accordingly. Many popular smart thermostats also integrate with voice assistants (Alexa, Google Assistant, HomeKit) and broader smart home platforms. Adding these connections during initial setup streamlines the experience.
Troubleshooting Common Installation Issues
No power or blank screen: Check that the breaker is on and the C-wire is properly connected. If there’s no C-wire, confirm the power adapter (if included) is correctly installed at the furnace. Some systems have a fuse on the control board that may have blown during installation, look for a small 3A or 5A automotive-style fuse and replace if needed.
System doesn’t respond to heat or cool calls: Verify each wire is seated firmly in its terminal and matched to the correct letter. A loose Y-wire means no cooling: a loose W-wire means no heat. If wires are correct but the system still won’t run, the thermostat may need the equipment type reconfigured in settings. Also, check for a safety switch or float switch on the furnace or AC that may have tripped.
Incorrect system cycling or short-cycling: Smart thermostats sometimes need adjustments to compressor and fan timing settings to match the equipment. Look in advanced settings for parameters like minimum run time, cycle rate (heat anticipator), and compressor lockout. Consult the HVAC system’s manual for recommended settings. If the system short-cycles repeatedly, it could indicate an undersized or failing component, consider calling an HVAC tech.
Wi-Fi won’t connect: Ensure the router is within range and the network is 2.4 GHz (most smart thermostats don’t support 5 GHz-only networks). Restart the router and thermostat, and double-check the password entry. Some networks with special characters or hidden SSIDs cause issues: temporarily broadcasting the SSID and simplifying the password can help during setup.
C-wire installation at the furnace: If the thermostat location has no C-wire but one is available at the furnace, it can be connected. At the furnace control board, find the C terminal and attach the unused wire from the thermostat cable. At the thermostat end, connect that same wire to the C terminal. This is low-voltage work, but if there’s any hesitation about working inside the furnace, hire an HVAC technician. Miswiring the control board can damage expensive components or create safety hazards.
Error codes on startup: Each brand has specific error codes listed in the installation manual or on the manufacturer’s support site. Common ones relate to wiring issues, incompatible equipment, or failed self-tests. Most can be cleared by rechecking connections and re-running the setup wizard. Persistent errors may indicate a problem with the HVAC system itself rather than the thermostat.
Conclusion
Installing a smart thermostat is a straightforward project that pays dividends in comfort and energy savings. By confirming compatibility upfront, following the wiring carefully, and taking time with the initial software setup, most homeowners can complete the swap in under an hour. If at any point the wiring seems unclear or the system behaves unexpectedly, don’t hesitate to call a licensed HVAC professional, thermostat installs are among their quickest service calls and can prevent costly mistakes.