Most smart thermostats install in under an hour with nothing more than a screwdriver and a smartphone. They’ll cut heating and cooling bills by an average of 10-15% annually while giving you remote control from anywhere. If you can label five wires and use a drill level, you can handle this upgrade yourself, even if your old thermostat looks like it predates the internet. This guide walks through the complete process, from shutting off power to configuring geofencing, so you can skip the $150-$250 installer fee and get your HVAC running smarter by dinnertime.
Table of Contents
ToggleKey Takeaways
- Most smart thermostat installations take under an hour with just a screwdriver and smartphone, and can reduce heating and cooling bills by 10-15% annually.
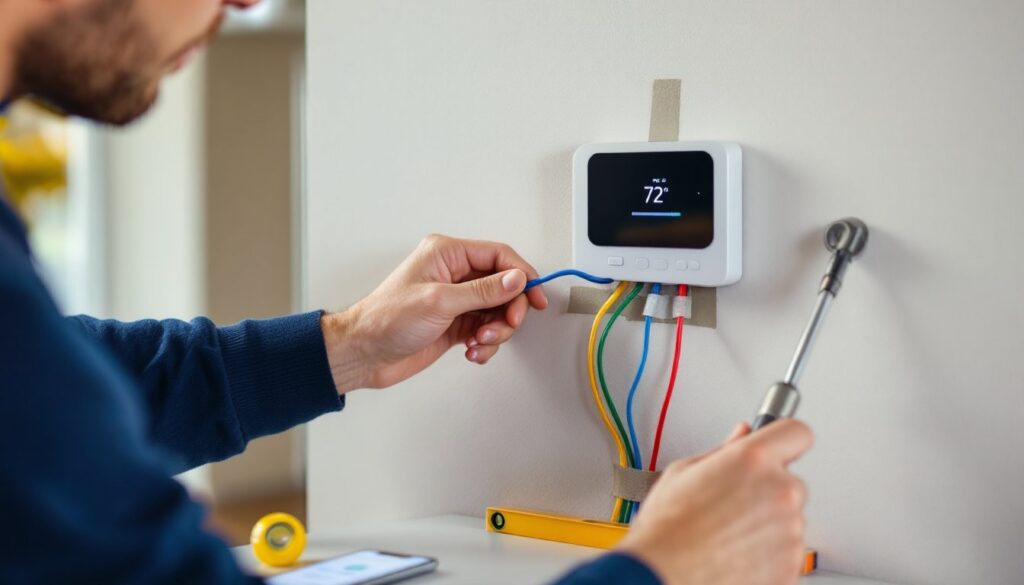
- Before starting, verify your HVAC system compatibility (typically 24V AC), confirm or install a C-wire for continuous power, and take a photo of your existing wiring for reference.
- Proper wire labeling (R, C, W, Y, G terminals) and careful connection to the new thermostat baseplate are essential to avoid equipment damage or system malfunctions.
- After powering on your smart thermostat, connect to 2.4 GHz Wi-Fi and configure scheduling, geofencing, and alerts through the manufacturer’s app to maximize energy savings.
- Test your heating and cooling systems immediately after installation to verify proper wiring before finalizing setup and closing the project.
What You Need Before You Start
Before touching any wires, confirm your system is compatible. Most central HVAC systems work with smart thermostats, but some older setups, particularly high-voltage baseboard heaters (120V or 240V) or proprietary systems, won’t. Check your current thermostat’s voltage: if it runs on 24V AC (the standard for gas furnaces, heat pumps, and central AC), you’re good. Nearly all smart thermostats include online compatibility checkers: snap a photo of your existing wiring and upload it to the manufacturer’s website.
Next, verify you have a C-wire (common wire). This provides continuous 24V power to keep the thermostat’s display and Wi-Fi active. Older thermostats often lack a C-wire because they ran on battery power. If you don’t have one, you have three options: run a new wire from your furnace, use a C-wire adapter (often included with models like Ecobee), or choose a thermostat designed to work without one (some Nest models can pull power through other wires, though reliability varies).
Tools and materials:
- Screwdriver set (Phillips and flathead)
- Drill with level (if patching old screw holes or relocating the thermostat)
- Wire labels or masking tape and a marker
- Smartphone or tablet for setup
- Optional: drywall anchors if mounting on drywall without a stud
Safety gear:
- Safety glasses (working near electrical boxes)
- Voltage tester or non-contact voltage detector
Double-check your breaker panel. Thermostats operate on low voltage, so the shock risk is minimal, but shutting off power is still mandatory to avoid damaging sensitive electronics during installation.
Turning Off Power and Removing Your Old Thermostat
Head to your breaker panel and flip off the breaker labeled for your furnace or HVAC system. If it’s not clearly labeled, turn off the main furnace switch (usually located on or near the unit itself). Use your voltage tester on the thermostat wires to confirm there’s no current before proceeding.
Remove the old thermostat’s cover by pulling it straight off or releasing the tabs on the sides. You’ll see the mounting plate attached to the wall with two to four screws. Before disconnecting anything, take a clear, well-lit photo of the wiring. Seriously, don’t skip this. It’s your insurance policy if labels fall off or you second-guess a connection later.
Label each wire using the terminal letters on your old thermostat (R, C, W, Y, G are the most common). Wrap a small piece of masking tape around each wire and write the corresponding letter on it. Common terminal meanings:
- R (or Rh/Rc): Power from the transformer
- C: Common (return path for power)
- W (or W1/W2): Heat
- Y (or Y1/Y2): Cooling/compressor
- G: Fan
Once labeled, loosen the terminal screws and gently pull each wire free. Keep the wires from slipping back into the wall by bending them outward or wrapping them around a pencil temporarily. Unscrew the mounting plate and set the old thermostat aside. If there’s a large hole or discolored paint behind it, now’s the time to patch or paint, or just cover it with the new thermostat’s larger baseplate.
Wiring Your New Smart Thermostat
Smart thermostats ship with a new mounting plate (often called a backplate or base). Thread your labeled wires through the center opening and hold the plate against the wall. Use a bubble level to get it straight, this matters more than you think, because a crooked thermostat is the first thing visitors notice. Mark the screw holes with a pencil, then drill pilot holes if you’re mounting into drywall. Use drywall anchors if you’re not hitting a stud.
Secure the plate with the provided screws. Make sure it’s snug but not overtightened, plastic backing can crack.
Now match each labeled wire to its corresponding terminal on the new base. Most smart thermostats use push-in connectors or screw terminals. Insert each wire fully (you should see about 1/4 inch of bare copper inside the terminal) and tighten the screw or press the connector closed. Give each wire a gentle tug to confirm it’s seated.
If you’re installing a C-wire adapter (common with Ecobee), the process differs slightly. The adapter typically installs at your furnace’s control board, splitting power to create a makeshift common wire. Follow the included diagram, it usually involves connecting two wires to specific terminals on the furnace and running the adapter wire back to the thermostat. This is where smart thermostat installation guides become invaluable for model-specific diagrams.
Common wiring variations:
- Heat pumps often have an O or B wire (reversing valve)
- Dual-fuel systems may use W2 for auxiliary heat
- Multi-stage systems can have Y1/Y2 for two-stage cooling
If you have wires you can’t identify, consult your furnace’s wiring diagram (usually stuck inside the access panel door) or the thermostat manufacturer’s support line. Don’t guess, incorrect wiring can damage equipment or cause short cycling.
Mounting and Powering On Your Device
With wiring complete, tuck any excess wire length neatly into the wall cavity. Align the thermostat body with the baseplate, most models click or snap into place, while others slide on from the bottom or top. You’ll feel it lock in when seated correctly.
Return to your breaker panel and flip the HVAC breaker back on. The thermostat should light up within a few seconds. If it doesn’t, double-check that the R wire is firmly connected (this is your power source). A blank screen usually means no power reaching the device.
Most units will walk you through an initial setup on the display: select your language, confirm the date and time, and identify your system type (gas, electric, heat pump, etc.). Answer these accurately, the thermostat uses this information to control staging and prevent damage to your equipment. When asked about the number of heating and cooling stages, refer back to that photo of your old wiring. If you had only a W and Y wire, you likely have single-stage heating and cooling. W1/W2 and Y1/Y2 indicate multi-stage systems.
Some installation walkthroughs recommend running a test cycle at this point: switch to heating mode and bump the temperature up a few degrees. Listen for the furnace to ignite and feel warm air from your vents within a couple of minutes. Then switch to cooling and confirm the compressor kicks on. This verifies your wiring before you finish setup and close everything up.
Setting Up Your Smart Thermostat App and Features
Download the manufacturer’s app (Nest, Ecobee Home, Honeywell Home, etc.) from the App Store or Google Play. Open the app and create an account if you don’t already have one. The app will prompt you to add a new device, select “Thermostat” and follow the pairing instructions. Most thermostats display a QR code or a six-digit pairing code on screen: scan or enter it in the app.
You’ll need to connect the thermostat to your Wi-Fi network. Choose your 2.4 GHz network, not 5 GHz, most smart thermostats don’t support the 5 GHz band. Enter your Wi-Fi password using the on-screen keyboard or app. The thermostat will take 30-60 seconds to connect and may download a firmware update immediately. Let it finish: these updates often include bug fixes and feature improvements.
Once connected, configure your preferences:
- Schedule: Set different temperatures for morning, day, evening, and night. Most people save the most energy by setting back temperatures during work hours and overnight (68°F while home, 62°F while asleep or away is a common starting point in winter).
- Geofencing: Allows the thermostat to detect when you leave home (using your phone’s location) and automatically switch to an away temperature. Enable this if your schedule is unpredictable.
- Smart learning: Models like Nest Learning Thermostat build a schedule automatically by observing your manual adjustments over the first week. If you prefer control, disable this and set a fixed schedule.
- Alerts: Enable low-temperature alerts (helpful if you have pets or plants), filter change reminders, and extreme runtime notifications (can indicate HVAC problems).
Link the thermostat to voice assistants if desired. Most support Amazon Alexa, Google Assistant, and Apple HomeKit. Just enable the relevant skill or integration in your voice assistant’s app and sign in with your thermostat account.
Energy-saving features vary by model. Ecobee’s SmartSensor system lets you place remote sensors in different rooms to average temperatures or prioritize certain spaces. Nest’s Seasonal Savings automatically makes tiny schedule tweaks to reduce energy use without sacrificing comfort. Explore your app’s settings, many features are disabled by default.
Troubleshooting Common Installation Issues
No power/blank screen: Verify the R wire connection at both the thermostat and furnace. Check that your breaker is on. If you have an Rh and Rc terminal, you may need a jumper wire between them (some thermostats include one). Test voltage at the furnace transformer, should read 24V AC. If it doesn’t, the transformer may be blown.
“No C-wire detected” error: If you thought you had a C-wire but the thermostat disagrees, check the furnace end, sometimes installers leave the C-wire bundled unused inside the furnace cabinet. If present, connect it to the C terminal on the control board. No wire at all? Install a C-wire adapter or use a battery-powered model.
Heating/cooling won’t turn on: Confirm you selected the correct system type during setup. A heat pump mistakenly configured as a conventional system won’t operate properly. Double-check that W goes to W, Y to Y, etc. Reversed wiring can prevent calls for heat or cool.
Wi-Fi won’t connect: Move closer to your router during setup. Thick walls or metal HVAC ducts can block signals. Make sure you’re connecting to 2.4 GHz, not 5 GHz. Restart your router if the network doesn’t appear. Some thermostats struggle with Wi-Fi networks using special characters in the password, try a simpler temporary password.
Short cycling (system turns on and off rapidly): This often indicates a wiring mistake or incorrect system configuration. Review your settings and confirm staging matches your equipment. If wiring is correct, you may have a failing component in your HVAC system, call a technician.
Inconsistent temperatures: Make sure the thermostat isn’t in direct sunlight, near a vent, or on an exterior wall. These placements cause false readings. If you installed remote sensors, confirm they’re placed in frequently used rooms and properly paired in the app.
For persistent issues, consult the manufacturer’s online support resources or contact their customer service. Most offer chat or phone support and can remotely diagnose problems by reviewing your system’s error logs through the app.
Conclusion
Installing a smart thermostat is one of the highest-return DIY projects you can tackle in an afternoon. Beyond the immediate convenience of app and voice control, the energy savings compound year after year, particularly if you use scheduling and geofencing consistently. Take time to explore your thermostat’s features over the first few weeks, adjust your schedule as needed, and check your utility bills after a full billing cycle to see the difference.