The Amazon Smart Thermostat offers DIYers a budget-friendly entry into smart home climate control, but the included quick-start guide leaves out critical installation steps and troubleshooting tactics. If the wiring diagram looks confusing or the app setup keeps stalling, this manual fills in the gaps. Whether it’s the first thermostat swap or the tenth, understanding wire labels, C-wire requirements, and factory reset procedures makes the difference between a smooth afternoon project and a service call. This guide walks through pre-installation checks, wiring specifics, app configuration, and the fixes for common errors.
Table of Contents
ToggleKey Takeaways
- The Amazon Smart Thermostat manual fills critical gaps left by quick-start guides, covering pre-installation checks, wiring specifics, app configuration, and troubleshooting to avoid costly service calls.
- A C-wire (common wire) is required for reliable operation; if your system lacks one, look for unused wires at the furnace air handler or use the included C-wire adapter.
- Always turn off power at the breaker, verify power is off with a voltage tester, and photograph existing wiring before disconnecting anything to prevent cross-wiring damage to the control board.
- The Amazon Smart Thermostat supports single-stage heating and cooling systems with 24-volt forced-air (gas, oil, electric, or central AC) but won’t work with baseboard heaters, proprietary systems, or multi-stage setups.
- Configure your thermostat for 2.4 GHz Wi-Fi (not 5 GHz), test heating and cooling modes separately, and apply a temperature offset if readings differ by 2–3°F from a calibrated thermometer.
- Manually program a four-period daily schedule (Wake, Leave, Return, Sleep) with 7–10°F setbacks to save roughly 1% on heating costs per degree, and avoid aggressive setbacks on heat pump systems to prevent costly auxiliary heating.
What You Need to Know Before Installing Your Amazon Smart Thermostat
Before cutting power to the HVAC system, confirm compatibility and gather the right tools. The Amazon Smart Thermostat works with most 24-volt forced-air systems (gas, oil, electric heat pumps, and central AC), but it won’t control high-voltage baseboard heaters, proprietary systems like Nest-specific heat pumps, or multi-stage systems requiring more than one heat and two cool stages.
Check for a C-wire (common wire). This blue or black wire provides continuous 24V power and is required for reliable operation. Older thermostats, especially mercury bulb models, often lack a C-wire at the wall plate. If there’s no C-wire visible, look inside the furnace air handler. Unused wires may be tucked behind the existing thermostat. Amazon includes a C-wire adapter in the box if the system lacks one, but installing it at the furnace requires basic electrical knowledge and adherence to NEC Article 725 for low-voltage wiring.
Tools needed:
- Flathead and Phillips screwdrivers (most thermostats use #1 or #2 Phillips screws)
- Needle-nose pliers (for straightening and stripping wires)
- Wire stripper (optional but cleaner than a knife)
- Drill with 3/16″ bit (if drywall anchors are needed)
- Level (the thermostat must sit plumb for accurate temperature readings)
- Smartphone with the Alexa app installed
Safety first: Turn off power at the breaker labeled for the furnace or air handler, not just the thermostat switch. Verify power is off with a non-contact voltage tester before touching any wires. Low-voltage thermostat wires won’t shock, but cross-wiring can fry the control board, which costs $150–$400 to replace.
Take a photo of the existing thermostat wiring before disconnecting anything. Label each wire with masking tape and a marker using the terminal letters (R, C, W, Y, G). This eliminates guesswork during installation.
Step-by-Step Installation Guide for Your Amazon Smart Thermostat
Removing Your Old Thermostat
With the breaker off, remove the old thermostat faceplate. Most units snap off or have a locking tab at the bottom. Once the plate is off, unscrew the terminal screws and gently pull each wire free. Wrap each labeled wire around a pencil or stick a toothpick through the wall opening to prevent them from falling into the wall cavity.
Remove the old backplate by unscrewing it from the wall. If the screw holes don’t line up with the new Amazon thermostat backplate, anchor holes may need to be drilled. Patch and paint any exposed drywall or wallpaper tears now, it’s easier before the new unit goes up.
Inspect wire ends. If they’re corroded, frayed, or bent, snip off 1/4″ and strip 1/4″ of fresh insulation. Solid, clean copper contact prevents intermittent connections.
Wiring and Mounting Your Amazon Smart Thermostat
Thread wires through the center opening of the Amazon thermostat backplate. Hold the backplate level against the wall and mark screw holes with a pencil. For drywall without a stud behind it, use the included plastic anchors. Drill 3/16″ pilot holes, tap in anchors, then screw the backplate snug, don’t overtighten or the plastic will crack.
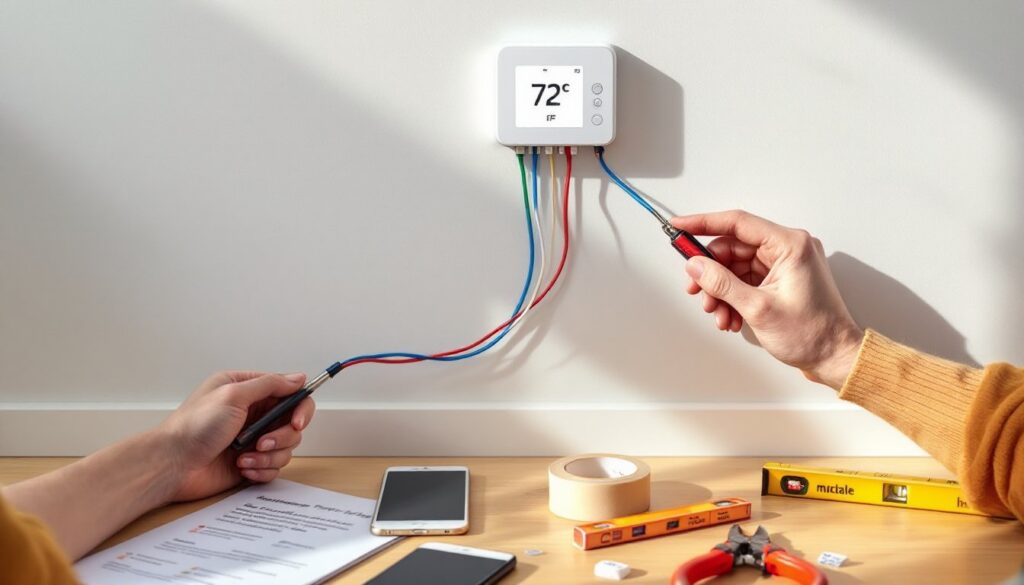
Connect wires to labeled terminals:
- R (red wire): 24V power from transformer
- C (blue or black wire): Common return
- W (white wire): Heat call
- Y (yellow wire): Cooling call
- G (green wire): Fan control
If the system uses a heat pump, there may be an O/B wire (orange or dark blue) for the reversing valve. Consult the in-app compatibility checker or furnace wiring diagram if terminals don’t match. The Amazon Smart Thermostat supports single-stage heating and cooling: systems with W1/W2 or Y1/Y2 may need a different model.
Tighten each terminal screw firmly, loose connections cause “No power to Rh wire” errors. Tug gently on each wire to confirm it’s seated. Snap the thermostat faceplate onto the backplate until it clicks. Restore power at the breaker. The display should light up within 10 seconds. If it doesn’t, recheck the C-wire connection or install the included C-wire adapter per the furnace-specific instructions.
Many users reference detailed compatibility checks before wiring to avoid returns due to system mismatches.
How to Set Up and Configure Your Amazon Smart Thermostat
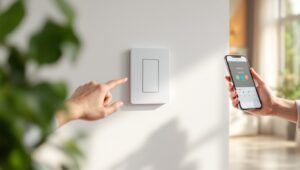
Once the thermostat powers on, open the Alexa app on a smartphone. Tap Devices > Plus icon > Add Device > Thermostat > Amazon. The app will scan for the thermostat over Bluetooth. Keep the phone within 10 feet during pairing.
Enter the Wi-Fi network name and password. The thermostat connects to 2.4 GHz Wi-Fi only, it won’t see 5 GHz networks. If the network doesn’t appear, reboot the router and confirm the 2.4 GHz band is broadcasting. Some mesh systems hide the SSID by default.
System configuration prompts:
- Select equipment type: Furnace, heat pump, or boiler. Choose based on the actual HVAC system, not the fuel type. Heat pumps use a reversing valve and should be configured as such.
- Number of stages: Most residential systems are single-stage. Multi-stage systems require a different thermostat.
- Fan control: Set to “Yes” if there’s a G-wire. This enables independent fan circulation without heating or cooling.
- Temperature offset: If the displayed temperature reads 2–3°F off compared to a calibrated thermometer placed nearby, apply an offset in the settings. Thermostats mounted on exterior walls or near supply vents often read inaccurately.
Test heating and cooling modes one at a time. Set the thermostat to Heat and raise the setpoint 5°F above room temperature. The furnace should ignite within 60 seconds. Set it to Cool and lower the setpoint 5°F below room temperature. The compressor and condenser fan should start within 3 minutes due to built-in short-cycle protection.
If nothing happens, check the breaker, furnace power switch (often looks like a light switch near the unit), and confirm the thermostat wiring matches the system. A common mistake is swapping the Rc and Rh wires on dual-transformer systems.
Programming Schedules and Optimizing Energy Savings
The Amazon Smart Thermostat includes Alexa Hunches and basic scheduling but lacks the adaptive learning of higher-end models. To maximize savings, manually program a schedule that matches actual occupancy.
In the Alexa app, navigate to the thermostat device > Temperature > Schedule.
Set four daily periods:
- Wake (e.g., 6:00 AM): Comfort temperature before getting up
- Leave (e.g., 8:00 AM): Setback 7–10°F in winter, setup 7–10°F in summer
- Return (e.g., 5:00 PM): Return to comfort temperature 30 minutes before arrival
- Sleep (e.g., 10:00 PM): Lower heat or raise cooling 3–5°F
Each 1°F setback for 8 hours saves roughly 1% on heating costs according to U.S. Department of Energy estimates. Over a winter, that’s $10–$30 depending on climate zone and fuel type.
Enable Home/Away Routines if the household has Alexa-enabled devices. The system can trigger temperature changes when everyone leaves (based on phone location) or the last Echo device stops detecting motion. This works best in homes with predictable schedules.
Monitor energy usage in the Alexa app under Energy Dashboard (if supported). The feature estimates runtime and suggests adjustments. But, it doesn’t replace a true energy monitor or smart meter data.
Avoid aggressive setbacks in homes with heat pumps. Dropping the temperature more than 3–5°F may activate auxiliary electric resistance heat, which costs 2–3× more per BTU than the compressor. Smart home advice from trusted sources often emphasizes gradual setbacks for heat pump systems.
Pair the thermostat with Alexa voice commands: “Alexa, set thermostat to 68,” or “Alexa, turn on Eco mode.” Voice control is faster than opening the app but doesn’t replace a well-thought-out schedule.
Troubleshooting Common Amazon Smart Thermostat Issues
“No power to Rh wire” error: The most common installation problem. Recheck the C-wire connection at both the thermostat and the furnace. If using the C-wire adapter, confirm it’s wired to the correct terminals on the control board and that the furnace door safety switch is engaged (the door must be fully closed for the system to operate).
Thermostat won’t connect to Wi-Fi: Confirm the router broadcasts a 2.4 GHz network with WPA2 security. The Amazon Smart Thermostat doesn’t support WPA3-only networks or hidden SSIDs. Move the router closer or add a mesh node if signal strength is weak. Restart the thermostat by removing it from the backplate for 30 seconds, then reattaching it.
Heating or cooling won’t turn on: Verify the system switch is set to the correct mode (Heat, Cool, or Auto). Check that the setpoint is at least 3°F above (heating) or below (cooling) the current temperature. Inspect the furnace and AC circuit breakers. If the HVAC system runs when controlled manually at the furnace but not from the thermostat, a wiring error or failed control board may be the culprit. This is the point to call an HVAC tech.
Temperature readings are inaccurate: Thermostats on exterior walls, near windows, or in direct sunlight read incorrectly. Relocate the thermostat to an interior wall, 52–60 inches above the floor, away from supply vents and heat sources. If relocation isn’t possible, apply a temperature offset in the Alexa app settings.
Schedule doesn’t follow programming: Confirm Home/Away Assist isn’t overriding the schedule. Disable it in the Alexa app if manual control is preferred. Also check for conflicting Alexa Routines that change the thermostat setpoint based on time or device triggers.
Factory reset: If all else fails, remove the thermostat from the backplate, press and hold the center button while reattaching it, and hold for 10 seconds until the screen flashes. This clears all settings and requires re-pairing with the Alexa app. Content from tech sites covering smart home devices often highlights reset procedures as a final troubleshooting step.
If the thermostat displays a constant “System Issue” warning, the HVAC system itself may have a fault, clogged filters, frozen coils, or a tripped float switch. Replace the furnace filter (typically every 1–3 months) and inspect the condensate drain line. Air filters should be 1-inch pleated, MERV 8–11 for most forced-air systems.