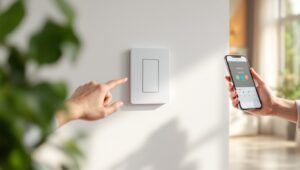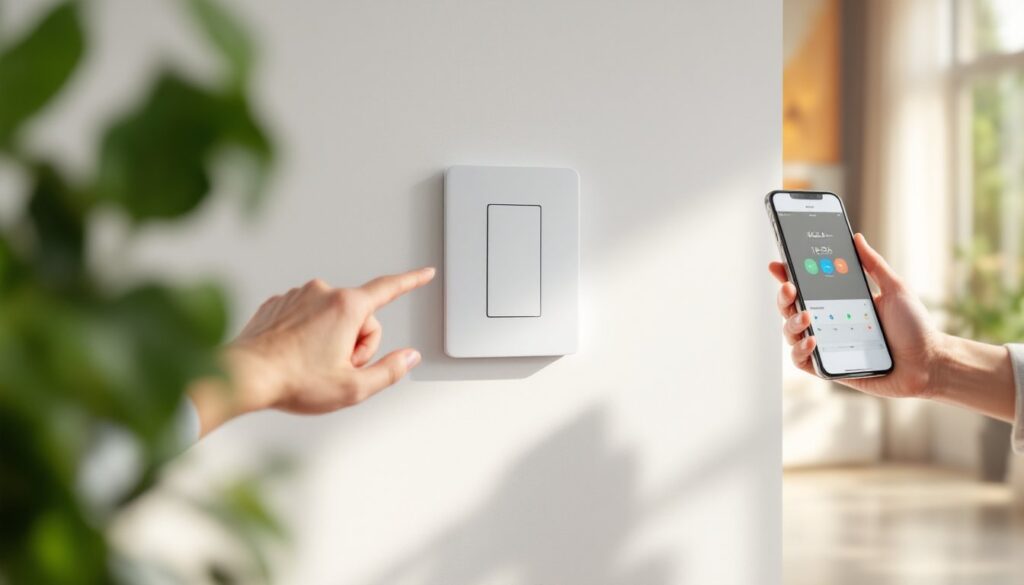
Smart lighting control doesn’t have to mean rewiring your entire house or buying into an expensive hub-based ecosystem. The Kasa Smart WiFi Light Switch plugs directly into your existing electrical setup and connects to your home network, no additional hardware required. For DIYers comfortable working with basic electrical wiring, it’s a straightforward weekend upgrade that brings voice control, scheduling, and remote access to any room. This guide covers what makes Kasa switches worth considering, how they stack up against competitors, and exactly what’s involved in replacing a traditional switch yourself.
Table of Contents
ToggleKey Takeaways
- The Kasa Smart WiFi Light Switch replaces any standard single-pole switch with no hub required, enabling voice control and remote access directly through your WiFi network.
- Installation takes 20–30 minutes per switch and requires a neutral wire, voltage tester, and basic electrical knowledge—verify your switch box has a neutral wire and adequate depth before purchasing.
- Schedule lighting with minute-level precision, enable Away Mode to mimic occupancy, and group multiple Kasa switches into scenes for coordinated control across your home.
- Kasa switches integrate seamlessly with Alexa, Google Assistant, and SmartThings without additional skills or complex setup after linking your account.
- Always test for neutral wire compatibility, use a voltage tester for safety, and reverse line/load connections if app control fails—common installation mistakes that affect functionality.
What Is the Kasa Smart WiFi Light Switch?
The Kasa Smart WiFi Light Switch is a direct replacement for standard single-pole light switches, manufactured by TP-Link. Unlike smart bulbs that screw into existing fixtures, this switch controls power at the wall, meaning any bulb or fixture wired to it becomes “smart” by default.
It connects directly to your 2.4 GHz WiFi network (most routers support dual-band, so this isn’t usually a problem). There’s no bridge, hub, or subscription required. Once installed, the switch communicates with the Kasa Smart app (iOS and Android), Amazon Alexa, Google Assistant, and Samsung SmartThings.
The most common model is the HS200, a single-pole switch rated for 15 amps at 120V AC. TP-Link also offers the HS210 for 3-way configurations (controlling one light from two locations) and dimmer variants like the HS220. All models require a neutral wire in the junction box, an important compatibility check before you buy.
Physically, the switch is larger than a traditional toggle or rocker switch. It measures roughly 1.7 inches deep, which can be tight in shallow boxes or boxes crowded with wire nuts. If you’re working with an older metal box or one packed with multiple cables, a test-fit before final installation saves headaches.
Key Features That Make Kasa Switches Stand Out
No Hub Required: The Kasa switch talks directly to your router. That reduces upfront cost and eliminates one more device competing for outlet space. It also means fewer points of failure, if a hub goes offline, so does your lighting. With Kasa, your switch is only dependent on WiFi and the app.
Scheduling and Timers: The Kasa app lets you program on/off schedules down to the minute. Vacation mode randomizes lighting patterns to simulate occupancy. You can set a countdown timer from the app or via voice command, useful for garage lights or basement workshops you don’t want left on overnight.
Away Mode and Grouping: Group multiple Kasa switches (and other Kasa devices) into scenes. A “Good Night” scene can turn off all downstairs lights and lock a Kasa smart plug powering a space heater. Away mode toggles lights on and off at random intervals to mimic someone being home.
Energy Monitoring (Select Models): The HS220 dimmer variant tracks runtime, helping estimate energy use over time. It’s not as granular as a dedicated energy monitor, but it’s a nice bonus if you’re trying to understand which rooms consume the most power.
Voice Control Integration: Kasa switches work with Alexa, Google Assistant, and SmartThings without requiring separate skills or complex setup. After linking your Kasa account, devices appear automatically. “Alexa, turn off the kitchen light” works immediately, no custom naming gymnastics.
Testing by third-party reviewers consistently notes the switch’s reliability and fast response times, even on congested networks. The HS200 variant handles single-pole applications well, though the lack of a physical on/off indicator light when controlled remotely can confuse houseguests expecting a visual cue.
Installation Guide: How to Replace Your Traditional Switch
What You’ll Need Before You Start
Tools:
- Flathead screwdriver (for prying off wall plate)
- Phillips screwdriver or drill with Phillips bit
- Wire strippers
- Voltage tester (non-contact or probe type, non-negotiable for safety)
- Needle-nose pliers (for bending wire loops)
- Flashlight or headlamp
Materials:
- Kasa Smart WiFi Light Switch (HS200 for single-pole, HS210 for 3-way)
- Wire nuts (usually included, but have spares)
- Electrical tape
Pre-Installation Checks:
- Neutral Wire Confirmation: Open your existing switch box. You should see a bundle of white wires capped together with a wire nut. If there’s no neutral, the Kasa switch won’t work. Older homes sometimes lack neutrals in switch boxes: running one requires rewiring or hiring an electrician.
- Box Depth: Measure the box. Kasa switches need about 2 cubic inches of space. Shallow boxes (less than 1.5 inches deep) or boxes crammed with multiple cables may not fit.
- Single-Pole vs. 3-Way: If your light is controlled by one switch, it’s single-pole. Two switches for one light? That’s 3-way, and you’ll need the HS210 model.
- Permits: Most jurisdictions allow homeowners to replace switches without a permit, but rules vary. If you’re adding new circuits or doing extensive rewiring, check local codes.
Safety Warning: Always turn off power at the breaker, not just the switch. Test with a voltage tester before touching any wires. If you’re uncomfortable working with live electrical boxes, hire a licensed electrician.
Step-by-Step Installation Process
-
Kill Power at the Breaker: Flip the breaker controlling the switch. Test the light to confirm it’s off. Use your voltage tester on the switch terminals to verify no voltage is present.
-
Remove the Old Switch: Unscrew the wall plate. Remove the two screws holding the switch to the box. Gently pull the switch out, exposing the wiring. You’ll typically see a black (hot/load), another black or red (hot/line), a green or bare copper (ground), and a bundle of white wires (neutral) capped in the back.
-
Identify and Label Wires (if needed): The Kasa switch has four connection points: line (black), load (black), neutral (white), and ground (green). If your old switch only had two brass screws and a ground, the two black wires are line and load. The Kasa app includes a wiring guide, but the general rule: the line wire brings power from the breaker, and the load wire sends power to the light.
-
Connect the Neutral: Untwist the wire nut holding the bundle of white neutral wires. Add the Kasa switch’s white neutral wire to the bundle and secure with a new wire nut. Tug gently to confirm a solid connection.
-
Attach Ground: Connect the Kasa’s green ground wire to the bare copper or green wire in the box (often pigtailed to the box itself if it’s metal). Use a wire nut or wrap around the ground screw, depending on setup.
-
Connect Line and Load: Attach one black wire to the brass terminal marked “line” and the other to “load.” If you’re unsure which is which, the line wire typically comes from the main cable bundle entering the box. When in doubt, consult the wiring diagram in the Kasa instructions or use a voltage tester (with power temporarily restored at the breaker) to identify the line.
-
Tuck and Secure: Fold wires neatly into the box. The Kasa switch is bulkier than a mechanical switch, so take care not to pinch wires. Screw the switch into the box using the provided screws. Attach the included wall plate.
-
Restore Power and Test: Flip the breaker back on. The Kasa switch will blink amber and green as it powers up. Press the physical rocker to confirm the light toggles on and off. If it doesn’t, power off again and double-check your line/load connections.
Common mistakes include reversing line and load (the switch may still work but won’t respond to app commands correctly) and failing to connect the neutral (switch won’t power on at all). Detailed setup experiences from users, including troubleshooting tips, are discussed in expert evaluations that cover real-world installation scenarios.
Setting Up and Controlling Your Kasa Switch
Once installed and powered, the switch needs to join your WiFi network. Download the Kasa Smart app and create a free account (or log in if you already have one). Tap the “+” icon to add a device, select “Light Switch,” and follow the prompts.
The switch will broadcast its own temporary WiFi network (something like “TP-Link_Switch_XXXX”). Connect your phone to that network, then use the app to send your home WiFi credentials to the switch. After 20–30 seconds, the switch will reconnect to your main network and the LED will turn solid green. Name the switch (“Kitchen Light,” “Garage,” etc.) and assign it to a room for easier organization.
Voice Assistant Linking: In the Kasa app, go to Settings > Integrations and select Alexa, Google Assistant, or SmartThings. Follow the OAuth linking process to authorize Kasa to communicate with your assistant. Devices sync automatically. You can rename them in the assistant’s app if the Kasa-assigned name doesn’t match your preferred voice commands.
Scheduling and Automation: Tap the switch tile in the app, then the clock icon. You can create recurring schedules (“Turn on at sunset, off at 11 PM”) or one-time events. Sunrise/sunset scheduling adjusts automatically based on your location. Away mode is under the same menu, enable it, set a date range, and the switch will randomize on/off times within your specified window.
Remote Access: As long as the switch is online and your phone has internet, you can control it from anywhere. Forgot to turn off the porch light before leaving for vacation? Open the app and toggle it off. If your router or ISP goes down, local control via the physical rocker still works, but app and voice commands won’t until connectivity is restored.
One quirk noted in detailed testing is that the switch requires a stable 2.4 GHz signal. If your router defaults to band steering or your access point is far from the switch, you may see intermittent disconnects. Switching to a dedicated 2.4 GHz SSID or adding a WiFi extender solves most issues.
Conclusion
The Kasa Smart WiFi Light Switch offers a no-hub path to smart lighting that’s within reach for most DIYers comfortable with basic electrical work. Installation takes 20–30 minutes per switch, assuming your box has a neutral wire and adequate depth. Once set up, scheduling, voice control, and remote access work reliably without subscription fees or complex integrations. If your project involves multiple switches, budget time for each, and don’t skip the voltage tester.